Need to automatically read, edit, or convert files (PDF/Word/CSV/Excel/Image/HTML) or perform essential utility functions in Power Automate/Logic Apps? Want something more secure & more customizable than 3rd party connectors like Adobe/Encodian/Plumsail/Muhimbi/AquaForest/Cloudmersive that is also essentially free in Logic Apps or no extra cost with a premium Power Automate license?
Try this set of over 30 File & Utility Azure Functions! (Examples in links)
-
Convert/Parse CSV to JSON-
Aggregations (Sum, Count, Min, Max, Avg, Median, Standard Deviation)
-Create Excel Table From JSON
-Get or Edit Excel Sheet Names
-Excel Sheets to CSVs
-Append Excel Sheets (Copy sheets from multiple Excels to one workbook) [merged files will not include macros or data models]
-Remove Excel Sheets
-Extract PDF Elements (Read PDF text, form fields, links, images, metadata, etc.)
-
Merge PDFs-
Split PDF (By page or by text)
-Rotate PDF
-Auto-Rotate PDF (So all pages are upright)
-Logic Apps OCR Text Replica (Transforms text & coordinates JSON from Logic Apps OCR Analyze Document for Prebuilt or Custom models (v4.x API) - prebuilt-read model action into a text replica of the file/file text layer. One can use the text replica in GPT/LLM prompts to extract/summarize/interpret data.)
-Find Text in PDF
-Replace Text in PDF
-PDF to HTML
-PDF to Word
-Extract Word Elements (Read Word text, tables, links, images, xml, comments, table of contents, metadata, statistics, etc.)
-Merge Words
-Split Word (By text)
-Find Text in Word
-Replace Text in Word
-
Edit Word With GPT-Word to HTML
-HTML to Word
-PDF to Images
-Images to PDF
-Resize Image
-Compress Image or PDF
-Msg File to HTML And Plain Text (Convert a .msg file into an HTML representation & plain text replica of the msg/email thread)
-Zip Files
Import & Set-Up
Find & download the Solution import package at the bottom of this main post. Go to the Power Apps home page (https://make.powerapps.com/). Select Solutions on the left-side menu, select Import solution, Browse your files & select the FileAndUtilityAzureFunctions_1_0_0_xx.zip file you just downloaded. Then select Next & follow the menu prompts to apply or create the required connections for the solution flows. And finish importing the solution.
Once the solution is done importing, select the solution name in the list at the center of the screen. Once inside the solution click on the 3 vertical dots next to the flow name & select edit.
Now that the flow is imported & open, we can see all the example pieces. Next we need to set up the Azure Function App used for all the HTTP calls in each of the examples.
If you have already worked with and deployed Azure Functions before, then you can skip the extra installations.
If you haven't deployed Azure Functions, you can go to the Microsoft Store & make sure you have VS Code & Python installed.
Once VS Code is installed, open it. Go to the 4 blocks on the left side menu to open the list of extensions. Search for Azure in the extensions & select to install Azure Functions. Azure Account & Azure Resources will automatically be installed too.
Once all the extensions are installed, go to the Azure A on the left side menu & select to sign in to Azure.
Next set up a project folder on your machine for Azure Functions & a sub-folder for this File And Utilities project.
Back in VS Code select the button to create a new Azure Function. Follow the Function set-up instructions selecting the File And Utility Functions project folder you just created, Python language Model V2, and where in VS Code to open the new Azure Function project.
Once all the project files are loaded in VS Code, select the function_app.py file. Remove all the code in the file. Go back to the tab with the flow, open the "Azure Function Python Script" action, copy its contents & paste them into the function_app.py file in VS Code. Cntrl+S / Save the file.
Next go to the requirements.txt file. Go to the flow to the "Azure Function Requirements.txt" action & copy its contents. Paste the contents into the requirements.txt file in VS Code. Cntrl+S / Save the file.
Go back to the Azure A on the left-side menu. Select the Deploy function button. Select Create New in the list of function. Follow the menus/prompts to create a new function (function name in VS Code must be lower-case).
[If Create New doesn't appear, you may have to log in to Azure, navigate to Azure Functions & go through the process to create a new function so the new function will appear in the list of function options to deploy to.]
Go to Azure & login. Go to Function App.
Find & select the newly deployed function. Select the function you want to use under Name.
Select Get function URL & in the pop-up menu & copy the Function key url.
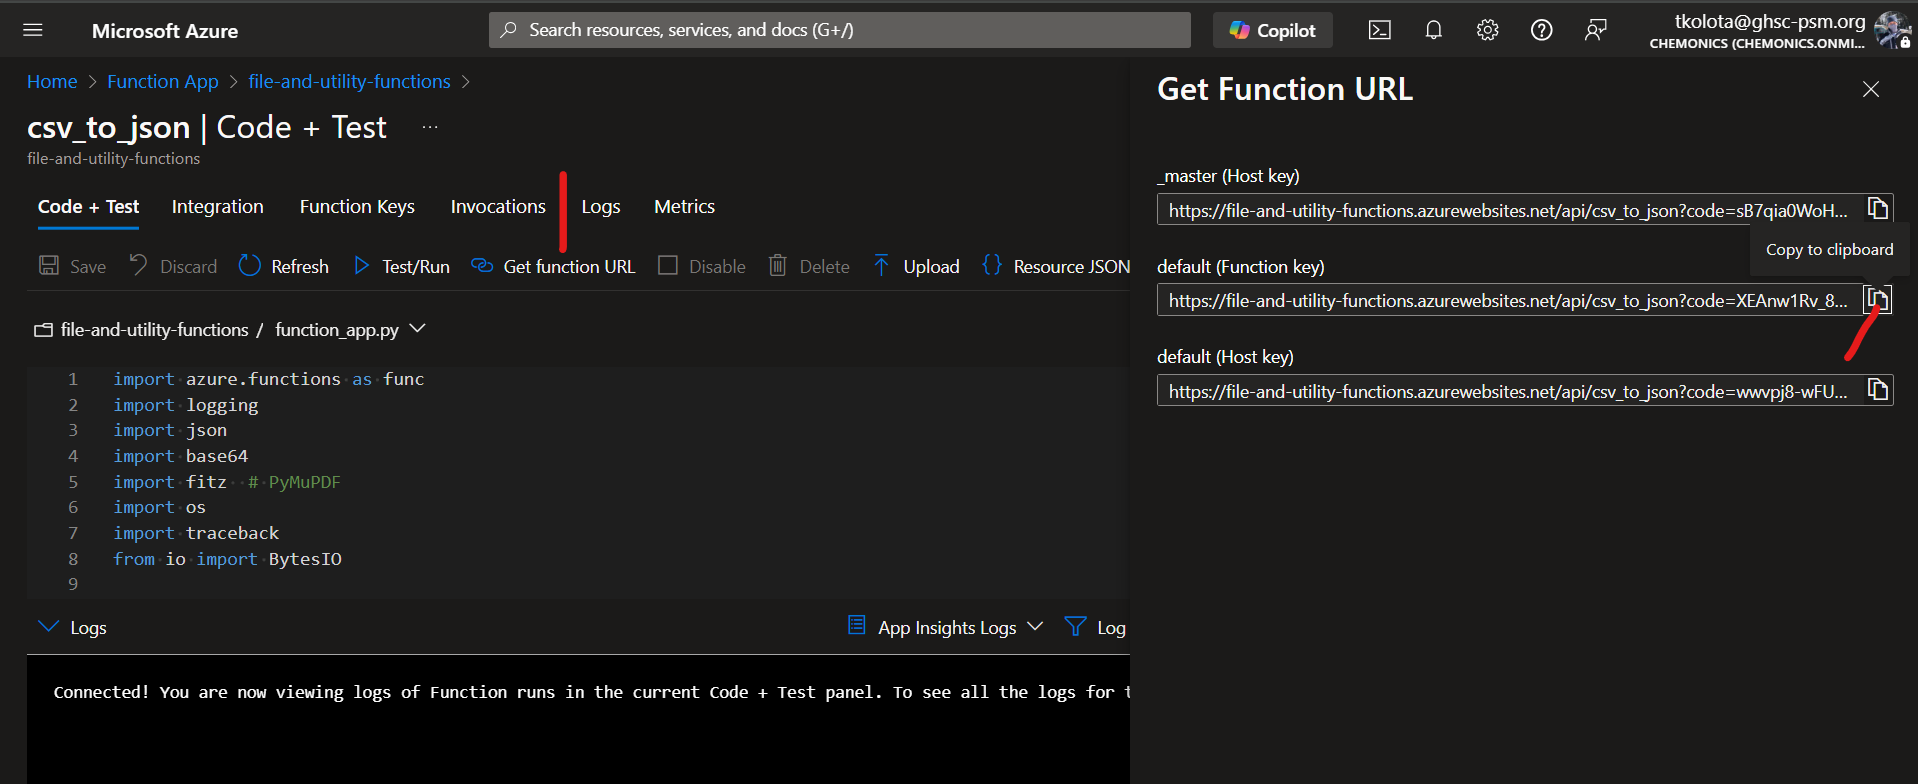
Paste the function URL into the URI input of the HTTP action(s) for that function.
Imports / Downloads
Solution Zip Download Link: https://drive.google.com/file/d/1Tg6FtTMaJFBbT6iRYM3S6dwqSb2_Ysni/view?usp=sharing
Legacy Power Automate Import: https://drive.google.com/file/d/1jb_oOM5qnIFiSnKUBS1upMyCXOZr9eVo/view?usp=sharing


