Want to automatically edit many Word documents?
Want to add summaries, translate, add/remove information related to a topic, highlight information related to a topic, redact information, change out links, or perform other updates on many Word documents?
Try this template to directly edit a Word file’s source code using GPT.
*Currently limited by the GPT4o-mini max output of about 60,000 characters. So your Word document can not exceed maybe 50,000 characters or about 10-20 pages of a text-heavy Word document.
**Template example is for 1 Word file, but if you have a use-case where you want to edit many Word documents with the same prompt, for example all word documents in a folder, then you can use something like a List files in folder action & move all relevant actions inside a loop running on the folder files outputs.
Example
Here is a sample Word document with some headers, bold/italics/underline text, a table, a picture, & comments.
Here is the prompt in the flow to translate, change links, redact, summarize, & adjust fonts in the document.
Here is the final Word document the flow output with a Spanish translation, new link, redacted names, & highlighted summary. Unfortunately some things like adjusting fonts doesn't work as I think it requires changing style/theme Word source code & those code components are currently too long for GPT4o-mini's 16k output token limit. But it was still able to do most things.
Import & Set-Up
Find & download the Solution import package at the bottom of this main post. Go to the Power Apps home page (https://make.powerapps.com/). Select Solutions on the left-side menu, select Import solution, Browse your files & select the SplitPDFByComponentDocuments_1_0_0_xx.zip file you just downloaded. Then select Next & follow the menu prompts to apply or create the required connections for the solution flows. And finish importing the solution.
Once the solution is done importing, select the solution name in the list at the center of the screen. Once inside the solution click on the 3 vertical dots next to the flow name & select edit.
Inside the flow editor you should see the following. We will 1st work to set up the Python Azure Functions required for the workflow to extract XML from a Word document & to update a Word document with new XML source code.
To set up Azure Functions go to Azure (https://portal.azure.com/#home) & find the Function App option. Then on the Function App page select to Create a new function.
On the licensing plan page select Flex Consumption or Consumption. Click Select.
On the next page set up your subscription, resource group, & app name. Select Python runtime stack, select your closest region, & use the other defaults. Select Review + create and select through the following menus until you get to a page where your app must load/deploy. Once it is deployed you should select the Go to Resource button that appears.
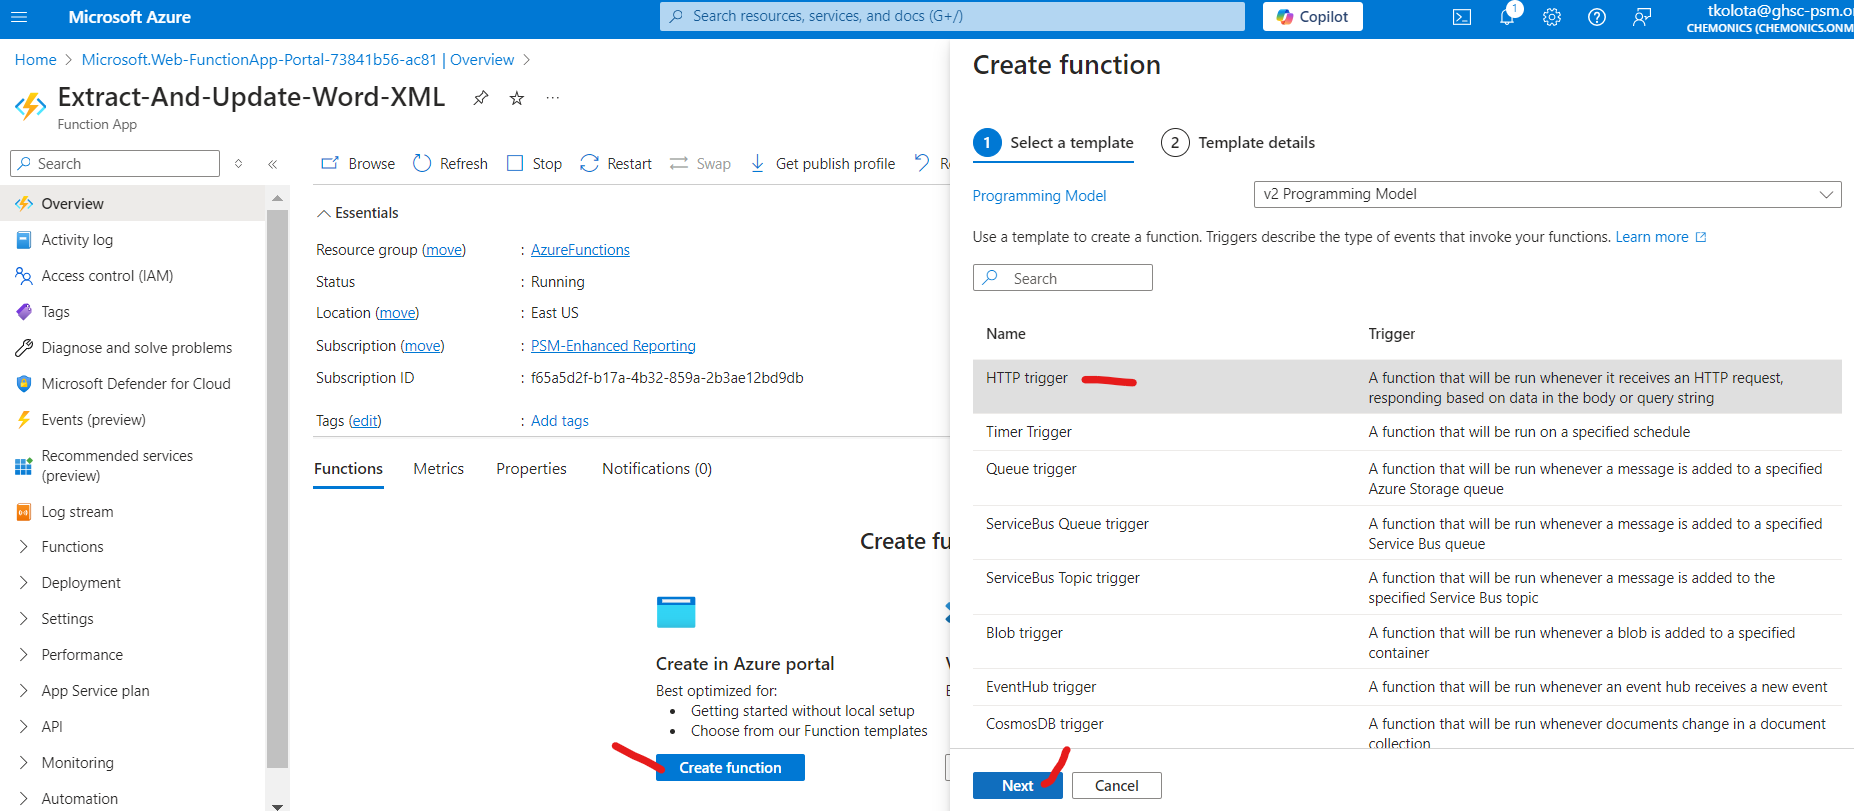
Once on the Function App's main page, select Create function under Create in Azure portal, select HTTP trigger in the pop-up menu, & select Next. You can keep the defaults on the next pop-up step & select Create.
Now a page should load for the default/template function code & trigger. Here is where we want to remove all the default code, go back to the template flow, copy all the code in the "Azure Function Python Script" action, & paste that Python code into the code editor. Then select to Save the new code.
Here is a copy of the Python code if you need it:
After that we need to get the HTTP call URIs for each of our Extract & Update functions. So we need to select our Function App name in the file-tree across the top to go back one menu. Then select the extract_main_word_xml function to go into its function menu.
Once inside the menu for extract_main_word_xml we need to select Get function URL & copy the Function key. We will go back to the template flow & paste this key into the URI of our 1st HTTP action.
Once we have set up that 1st HTTP for the extract, we then need to back out to the previous menu again & this time select the update_word_xml function.
That should bring us to the update_word_xml function menu where we can again select Get function URL & copy the Function key so we can paste it into the 2nd flow HTTP action URI.
That's the main set-up pieces. If you want to run the flow you will need to select a Word file in the Get file content action & make any adjustments to the Prompt inputs to fit your use-case.
Also note the template flow is set to check the length of the XML content extracted from the Word file. If the Word file contents & relevant XML source code are greater than 60,000 characters it will stop & fail the flow because the current GPT4o-mini model can only output about 60,000 characters of new source code. So it can't update Word files that exceed this limit.
And if you have a use-case where you want to edit many Word documents with the same prompt, for example all word documents in a folder, then you will need to use something like a List files in folder action & move all these actions inside a loop running on the folder files outputs.
Here is a copy of the prompt I used:
And if you imported the Solution file then the Create text with GPT action prompt should be pre-set. But if you need to manually set this up, all I did was go to Power Apps (
https://make.powerapps.com/), go to AI hub on the left-side menu, selected Prompts, Selected Build your own prompt, named the prompt, inserted 1 text dynamic input, selected the default GPT4o-mini model, selected JSON output, tested the prompt, & selected Save. Then that prompt will be available in the Create text with GPT action.


