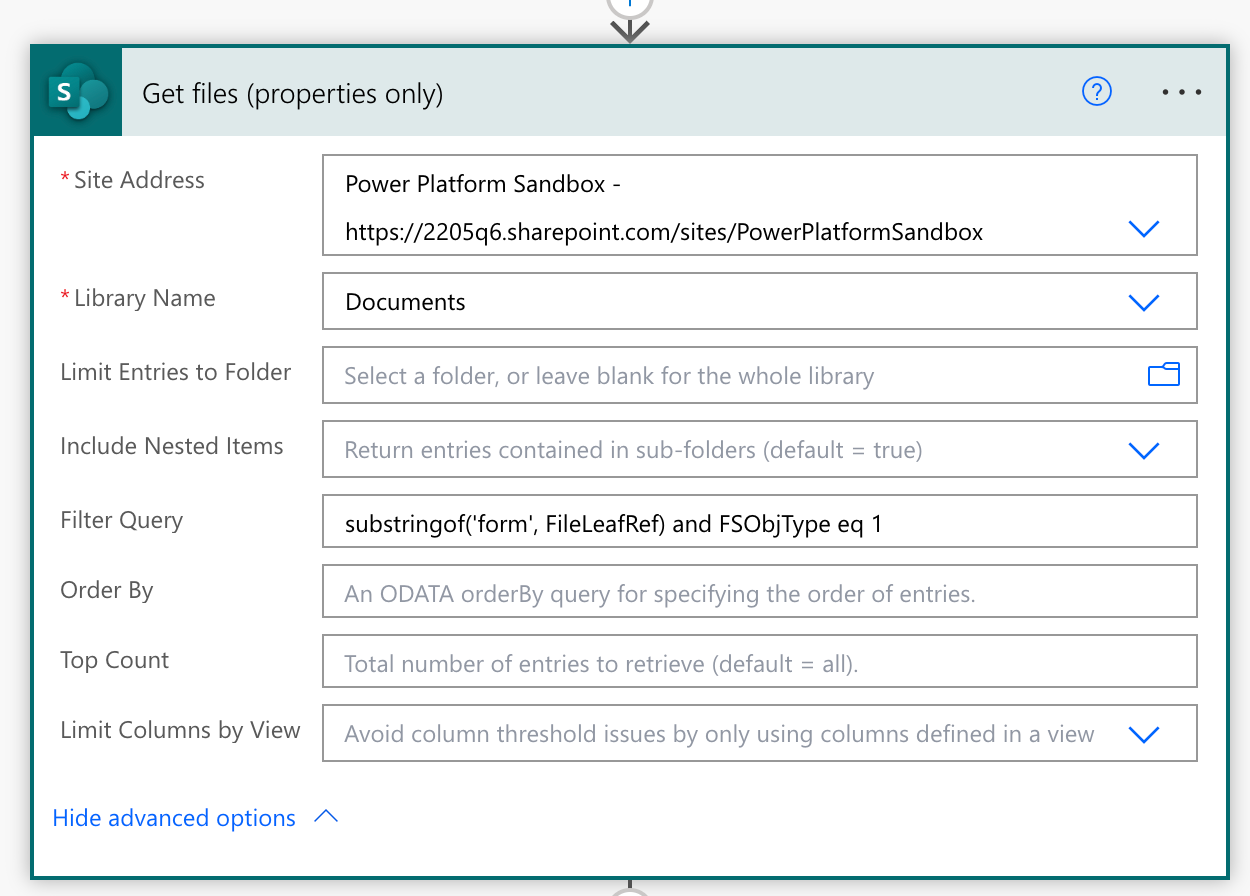
The logic of your flow needs to be adjusted. In your case, there isn't a need for two Apply to Each actions—neither of them currently interact with each other. The first one is unnecessary as you can define a Filter Query to filter out the files you need right in the Get Files (properties only) action.
Define a Filter Query
Use the substringof opreator. In my example below I'm searching for files with 'form' in the file name. Note: When using the substringof operator—the string used isn't case sensitive.
Also, this action returns files and folders. To filter out files only you need to use FSObjType eq 1—to filter out folders only, use 0.
Return Count of Items
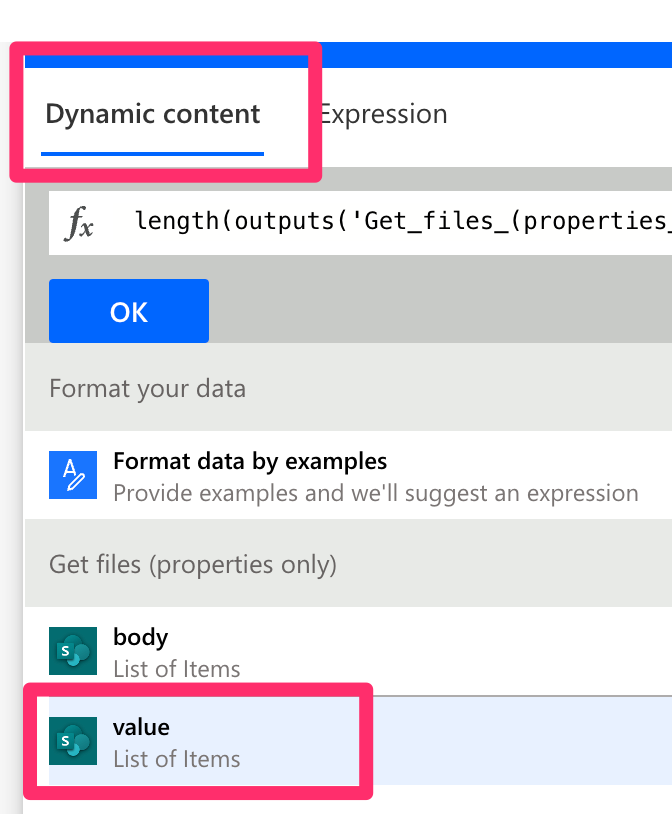
Whenever I use a Filter Query in a Get Items action, I always like to return the count of items returned in a Compose action. This is helpful when building a flow and can also be used to troubleshoot your flow.
Insert a Compose action. Add an Expression. Use the length() function.
Select the Dynamic content tab and insert the value dynamic content from the Get Items action into the length() function.
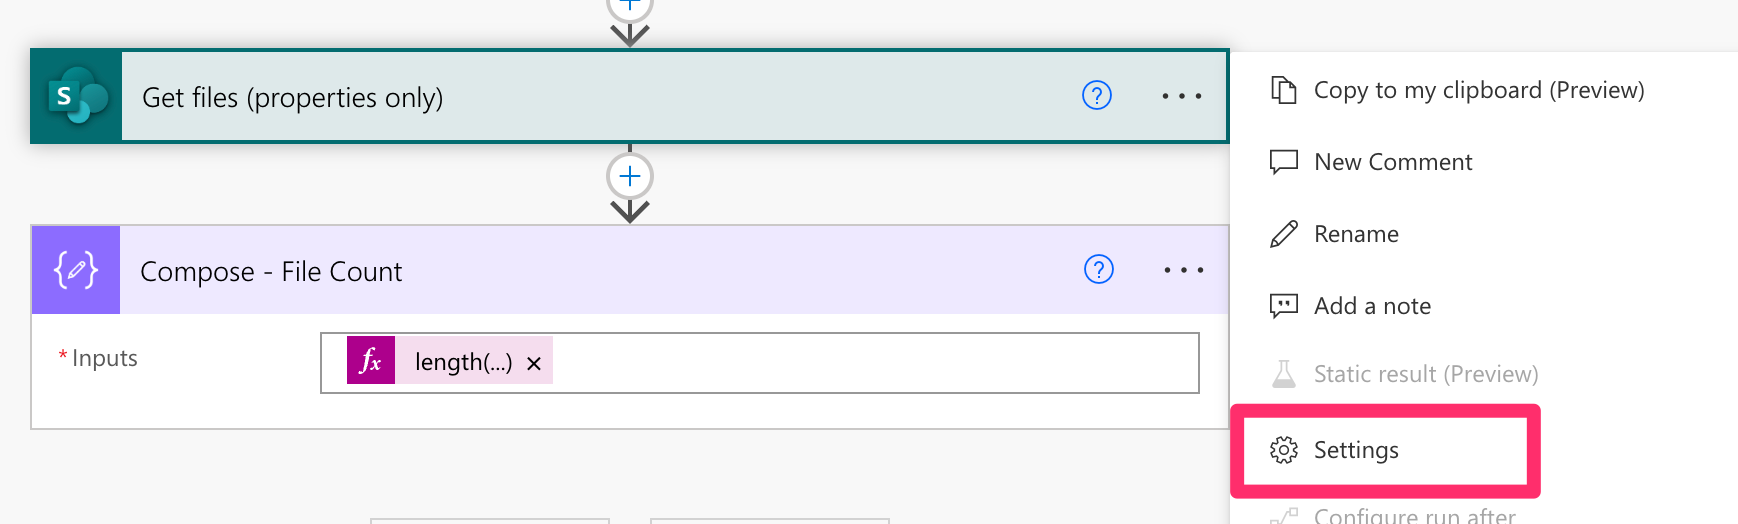
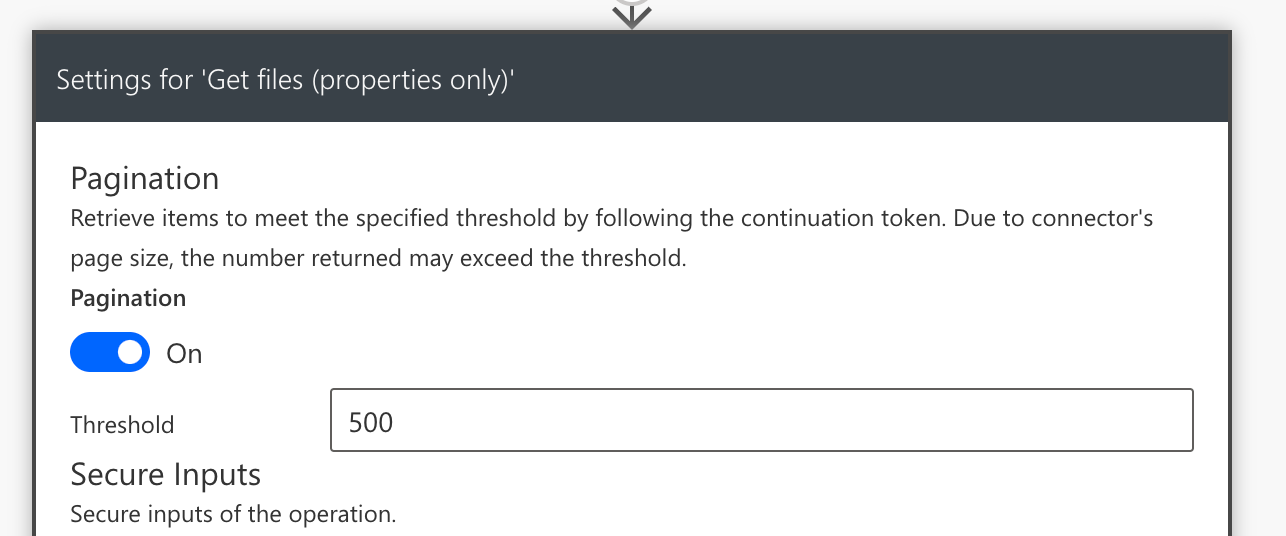
Run a test. Review the output of the Compose action. If it's not outputting the number of files you are expecting, you'll need to troubleshoot why. One of the reasons could be if you have more than 100 files in your document library. If so, you will need to toggle on Pagination.
Apply to Each
Now you can loop through the files returned from the Get Files (properties only) action. It's always more efficient to loop through files that meet your criteria. If you want to send a message for each file returned, then you would also nest the Post message in a chat or channel action inside the Apply to Each action.
However, if you want to send a single message with a list of files and the rows, you'll need to have the Post message in a chat or channel OUTSIDE of the Apply to Each action.
To learn more about the Apply to Each action—check out this YT Tutorial:
In this video tutorial I’ll go over how to avoid these common mistakes when using the Apply to Each action in a Power Automate flow:
1️⃣ Looping through a Single Item
2️⃣ Creating Unnecessary Nested Loops
3️⃣ Looping through an Unfiltered Array
At the end of the video I share a few helpful insights when it comes to using the Apply to Each action in your flow.
IN THIS VIDEO:
✓ How to avoid the Apply to Each action with a single item array
✓ How to use the item() function to access dynamic content in an array
✓ How to prevent unnecessary nested Apply to Each action loops
✓ How to use the Select action
✓ How to convert an array to a string with the Select action
✓How to use the Filter Query field
✓ How to count the number of items in an array
✓ How to use a condition control
✓ How to use the concurrency control
✓ How to set a top count
✓ How to use Compose actions for troubleshooting
List Rows Present in a Table
From here you will need to use the List Rows Present in a Table action to get each file and return the count of rows in each file. However, you need to ensure the data in your Excel file are contained in a table.
... more to come but in the meantime you'll want to refer to the YT Tutorials linked below:
In this Microsoft Power Automate tutorial, I’ll show you how to dynamically set the File and Table field.
IN THIS VIDEO:
✓ How to create an Automated Cloud Flow
✓ How to dynamically select a Table in the List Rows Present in a Table Action
✓ How to use the Parse JSON action
✓ How to use the When a file is created (properties only) trigger
✓ How to avoid the Apply to Each Action
✓ How to Create an Item in SharePoint from Excel Data
---
Formatting Excel data into a table can be done with a few clicks. If you have a workbook with multiple sheets of data all needing to be formatted into a table—it would take too many clicks.
In this video tutorial I will show you how add a script to Excel that will format all of the data in your entire workbook into tables. You can even customize the table style. This time saving automation will allow you to quickly create multiple tables with a single click.
This tutorial will also cover how to use the Run Script action in a Power Automate flow to completely automate adding Excel data into a SharePoint list. I will show you how to dynamically select an Excel file and table.
IN THIS VIDEO:
✓ How to Add a Script to Microsoft Excel
✓ How to Create Multiple Excel Tables Quickly
✓ How to use the Run Script action in Microsoft Power Automate
✓ How to import data from Excel into a SharePoint List with a Power Automate Flow
✓ How to Use the Get Tables Action
✓ How to Use a Dynamic Table Name and File Name in the List Rows Present in a Table Action
✓ How to Copy an Power Automate Action and Reuse It
Hope this helps!


