In this post, we’re exploring a practical implementation of Copilot Studio where a Copilot is deployed on a custom website integrated with Dataverse and AI Builder for enhanced functionality. What sets this solution apart is the use of Manual Authentication to securely connect the Copilot to external systems, specifically for interacting with Dataverse data and leveraging AI models.
The Copilot helps users interact with customer records stored in Dataverse, using AI Builder to automate document processing and extraction tasks, like reading invoices or contracts. However, instead of relying on default Azure AD authentication, this solution implements manual authentication, giving developers more flexibility in how user credentials and access tokens are handled.
You can refer to this link to understand more on how to Build a Copilot that can integrate the Dataverse Knowledge using AI Builder.
https://msdcentral.site/co-pilot-studio-how-to-use-ai-builder-integrate-with-dataverse-in-co-pilot/
Scenario:
- Currently we have a Copilot that is using AI builder and Integrated with Dataverse. It can provide the required Response from the Dataverse table knowledge.
- This setup will work fine inside the Copilot Studio, and any channels that comes with Authentication Type: Authenticate with Microsoft.
But when the "Authenticate with Microsoft" option is selected, all channels except the Teams channel are disabled.
- This configuration automatically sets up Microsoft Entra ID authentication for Teams without the need for any manual configuration. Since Teams authentication itself identifies the user, users aren’t prompted to sign in while they’re in Teams, unless your copilot requires an expanded scope.
- Only the Teams channel is available if you select this option. If you need to publish your copilot to other channels but still want authentication for your copilot, choose Authenticate manually.
To Do (Expected):
- We need to deploy this Copilot into a Website.
- Now we try to enable the Channel for Custom Website, you can see the below message.
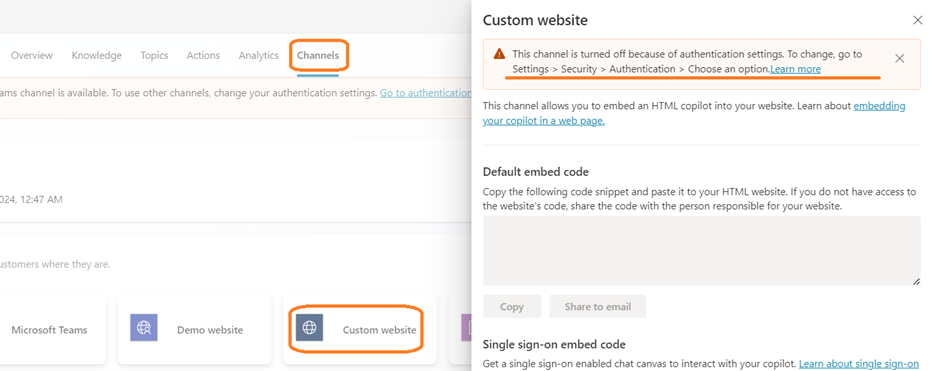
- The System will Prompt us to change the Authentication settings.
- Only if we enable the authentication as Authenticate manually, we will be allowed to be deployed in Custom Website.
Note:
In the Blog we will just see how to deploy in the Demo Website, since I do not have my own custom website.
- Below is the Copilot that provides the required information by connecting to dataverse.

- When we navigate to Settings -> Security.
- Click on Authentication.
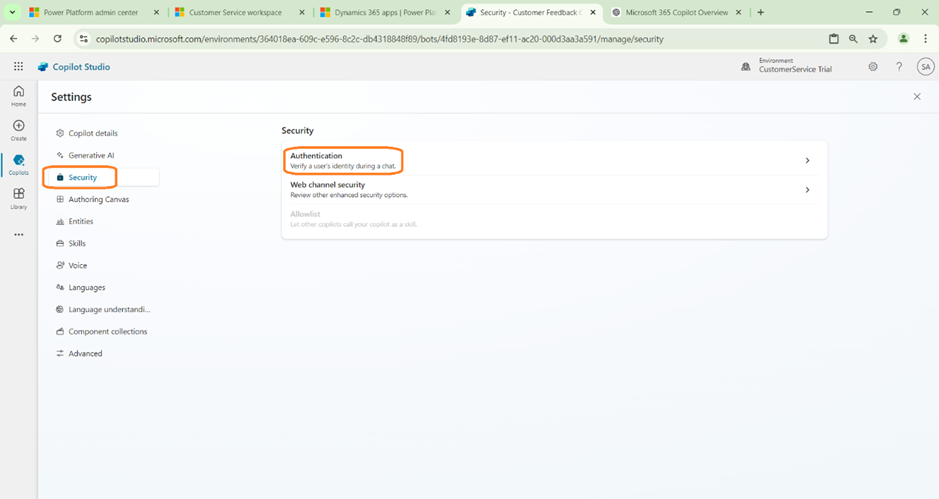
- Now currently, the Authentication is set to Authenticate with Microsoft.
- We will want to change this to Authentically Manually if we need to deploy this Copilot in other channels such as Websites.
Set-Up Manual Authentication:
The “Authenticate Manually” option in Copilot Studio is used to configure custom authentication methods when the default authentication flow is not applicable or desired. It allows developers to create custom authentication flows by managing tokens, credentials, or API keys manually, which are then passed to the Copilot for accessing various services or APIs.
In some scenarios, the bot might need to interact with external systems or APIs that do not use Azure AD for authentication. For instance, if you are connecting to third-party systems like custom databases, external CRMs, or other platforms that require API key-based authentication, manual authentication would allow you to handle these custom flows.
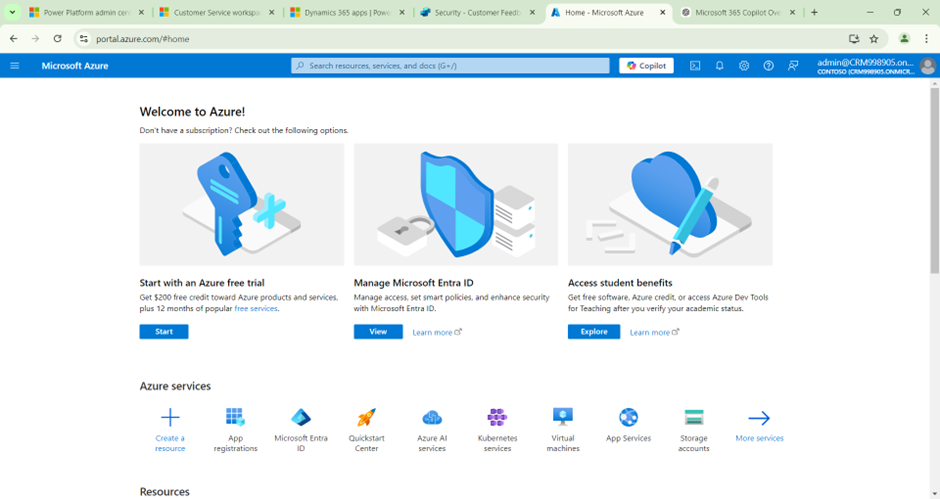
- Sign in to the Azure portal, using an admin account in the same tenant as your copilot.

- Select New registration and enter a name for the registration. Don’t alter existing app registrations.
- Under Supported account types, select Accounts in any organizational tenant (Any Microsoft Entra ID directory – Multitenant) and personal Microsoft accounts (e.g. Skype, Xbox).
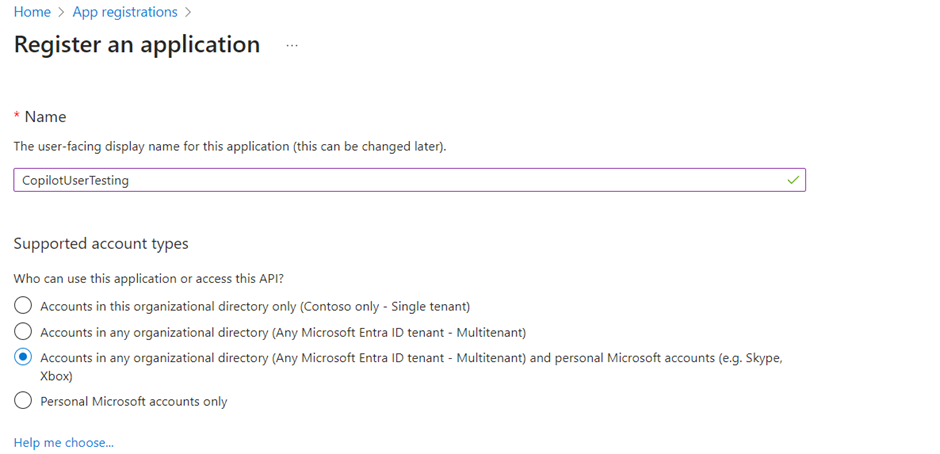
- Leave the Redirect URI section blank for now. Enter that information in the next steps.
- Select Register.
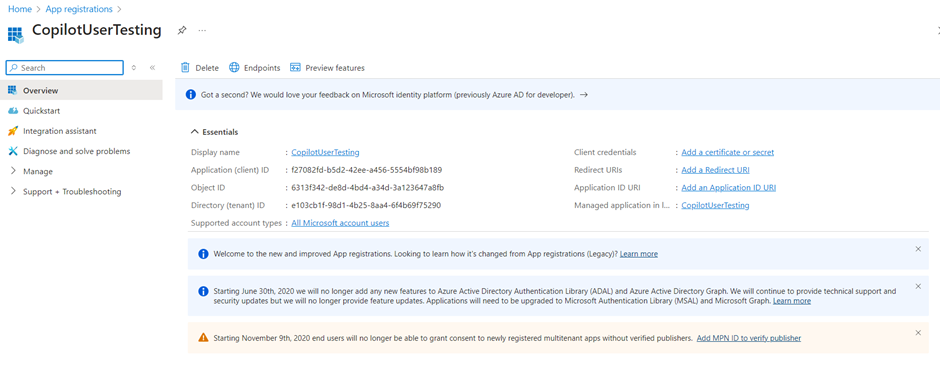
- After the registration is complete, go to Overview.
- Copy the Application (client) ID and paste it in a temporary file. You need it in later steps.
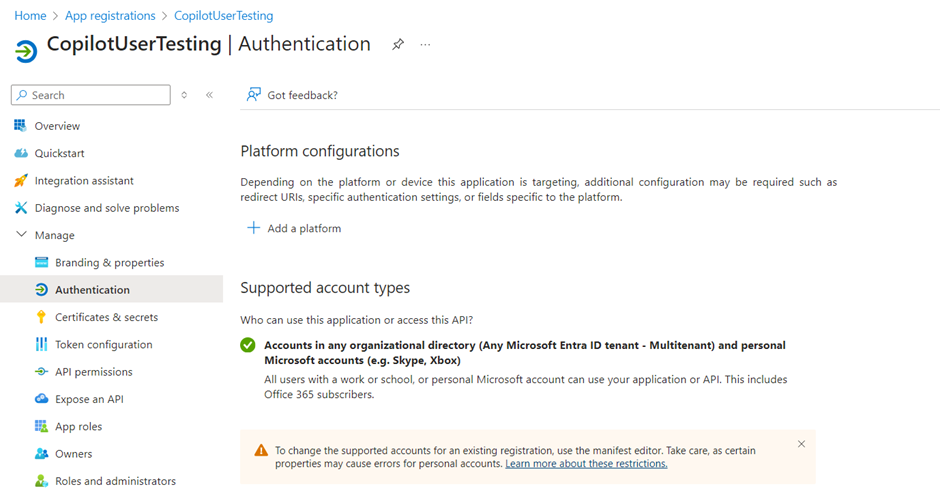
- Under Manage, select Authentication.
- Under Platform configurations, select Add a platform, and then select Web.
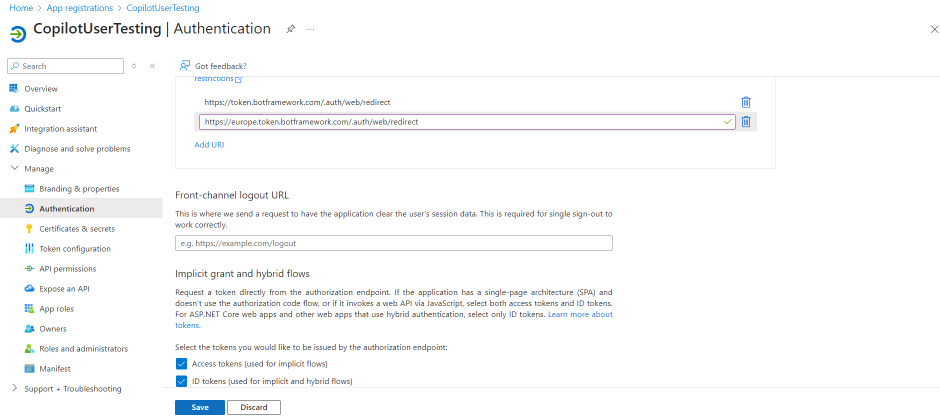
- Under Redirect URIs, enter https://token.botframework.com/.auth/web/redirect, and select Configure.

This action takes you back to the Platform configurations page.
- Under Redirect URIs for the Web platform, select Add URI.
- Enter https://europe.token.botframework.com/.auth/web/redirect, and select Save.
- In the Implicit grant and hybrid flows section, select both Access tokens (used for implicit flows) and ID tokens (used for implicit and hybrid flows).
- Select Save.
- Next step we need to create a Client Secret.
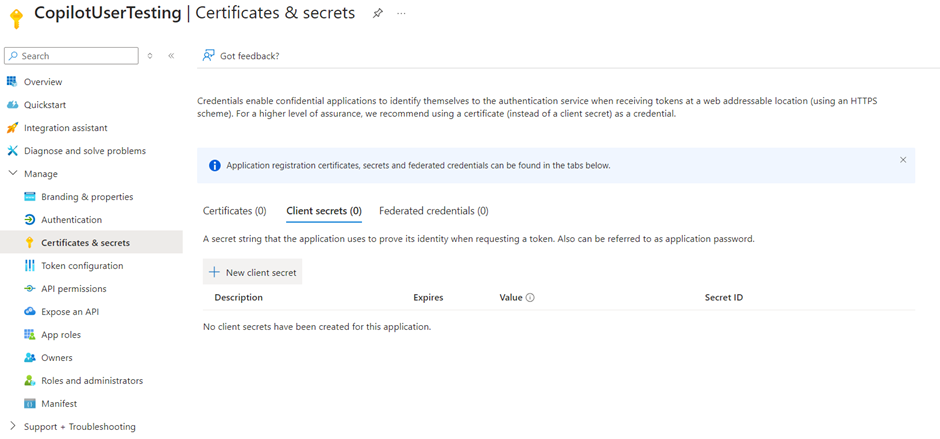
- Under Manage, select Certificates & secrets.
- In the Client secrets section, select New client secret.
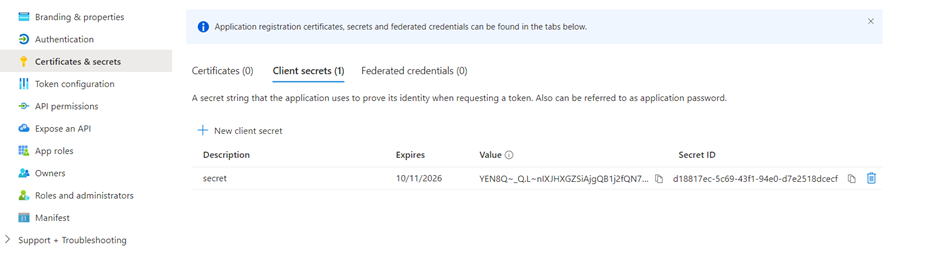
- Select the expiry period. Select the shortest period that’s relevant for the life of your copilot.
- Select Add to create the secret.
- Store the secret’s Value in a secure temporary file. You need it when you configure your copilot’s authentication later on.
- Next step is to Configure manual authentication.
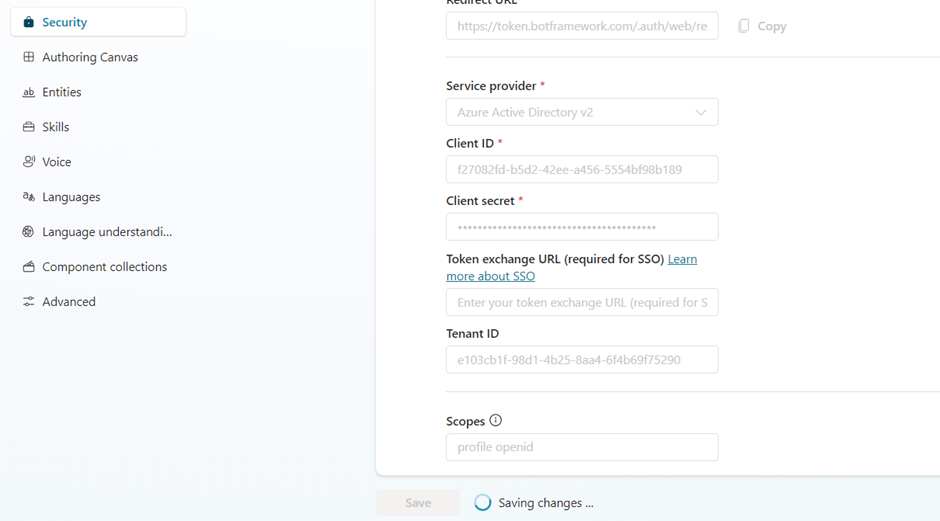
- In Copilot Studio, go to Settings for your copilot, and select Security.
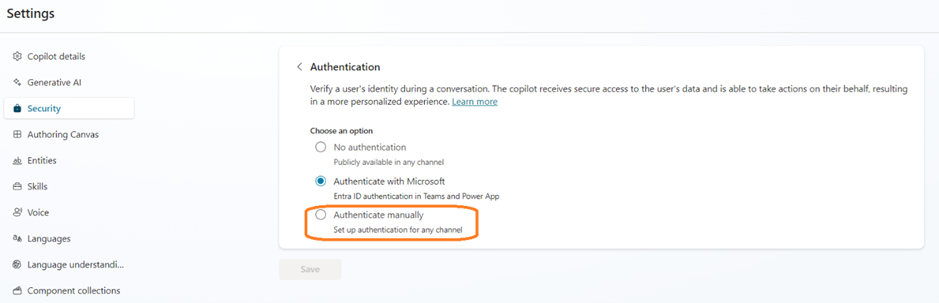
- Select Authentication.
- Select Authenticate manually.
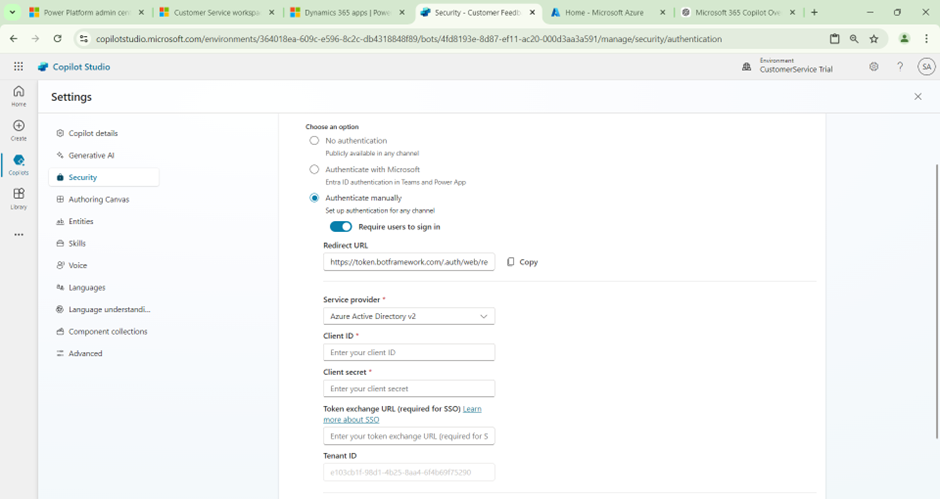
- Leave Require users to sign in on.
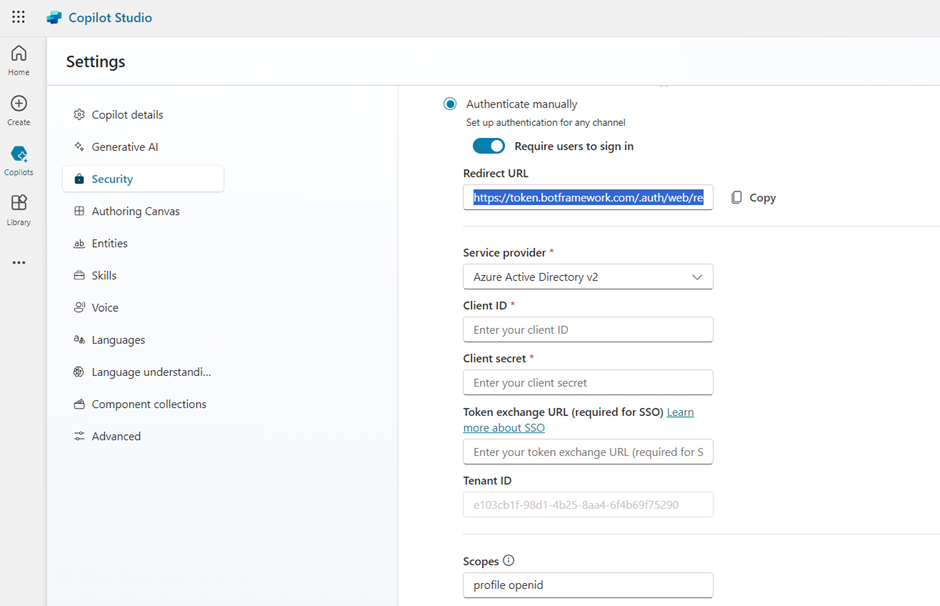
- Enter the following values for the properties:
- Service provider: Select Azure Active Directory v2.
- Client ID: Enter the application (client) ID that you copied earlier from the Azure portal.
- Client secret: Enter the client secret you generated earlier from the Azure portal.
- Scopes: Enter profile openid.
- Select Save to finish the configuration.
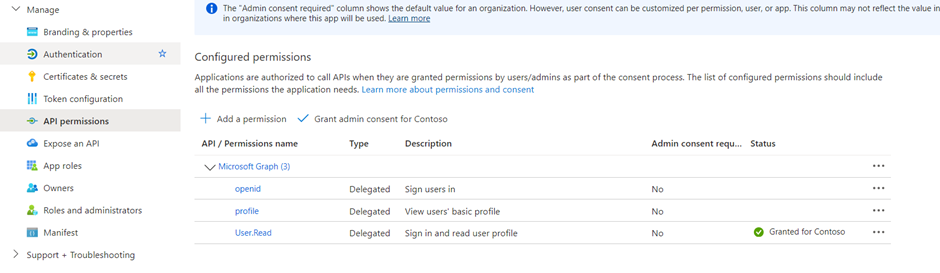
- Now again navigate to the Azure Portal to Configure API permissions.
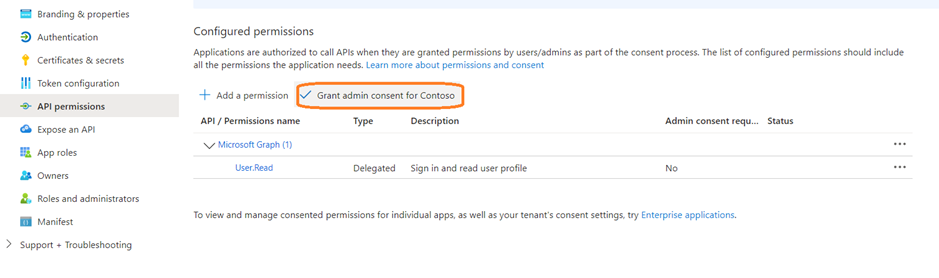
- Go to API permissions.
- Select Grant admin consent and then select Yes. If the button isn’t available, you might need to ask a tenant administrator to do enter it for you.
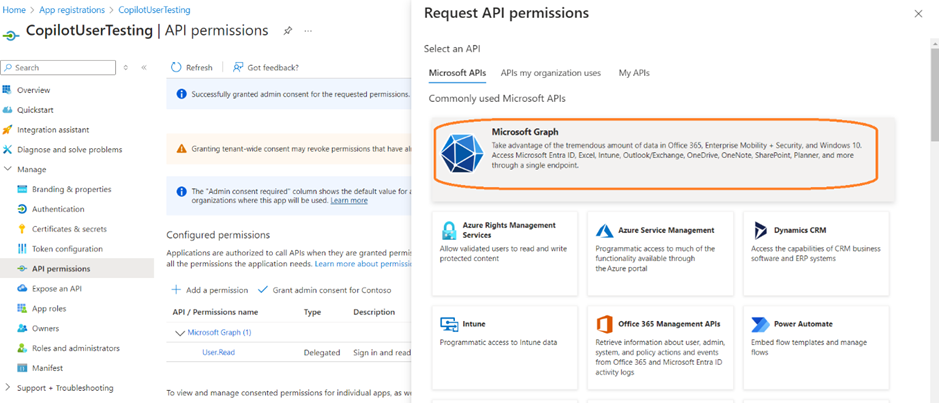
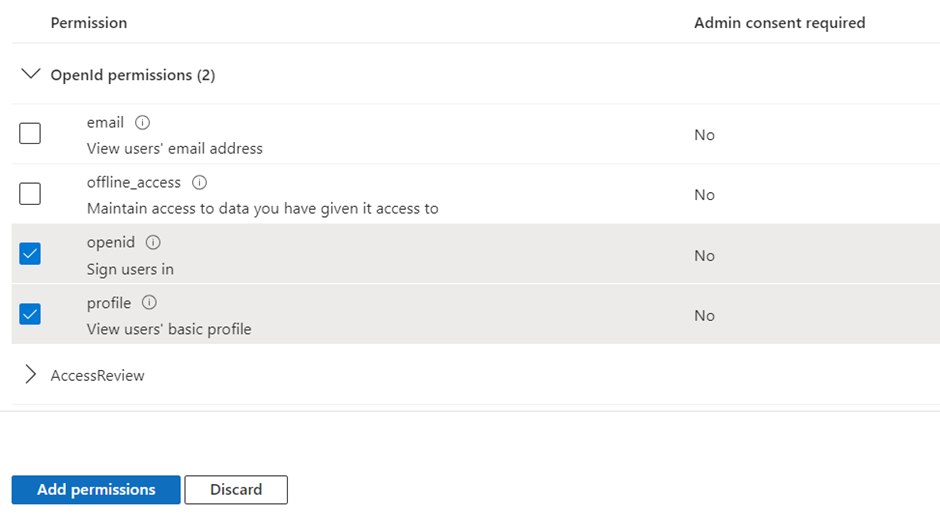
- Select Add a permission, and then select Microsoft Graph.
- Select Delegated permissions.
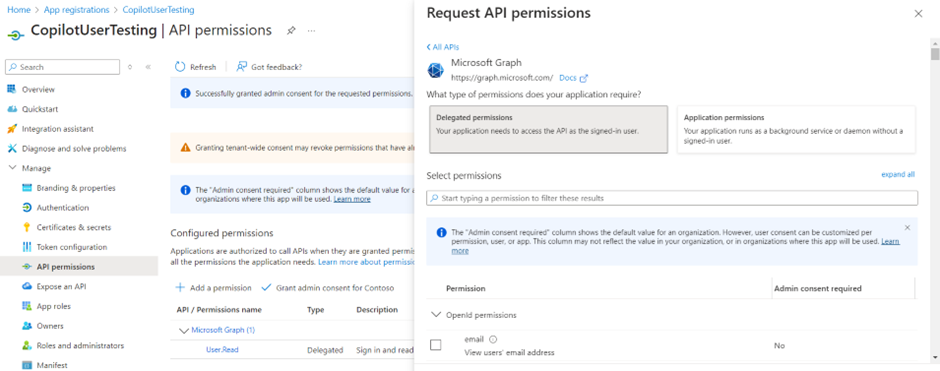
- Expand OpenId permissions and turn on openid and profile.
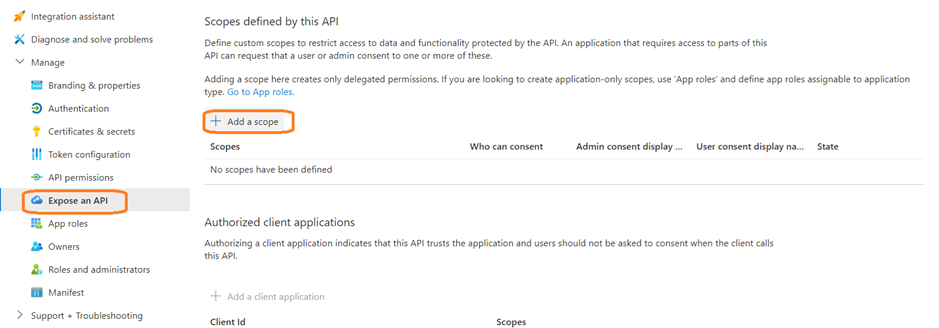
- Now we need to Define a custom scope for your copilot. Scopes allow you to determine user and admin roles and access rights.
- Go to Expose an API and select Add a scope.
- Set the following properties. You can leave the other properties blank.
- Scope name: We input Test.Read
- Who can consent?: Select Admins and users
- Admin consent display name: Test.Read
- Admin consent description: Enter Allows the app to sign the user in.

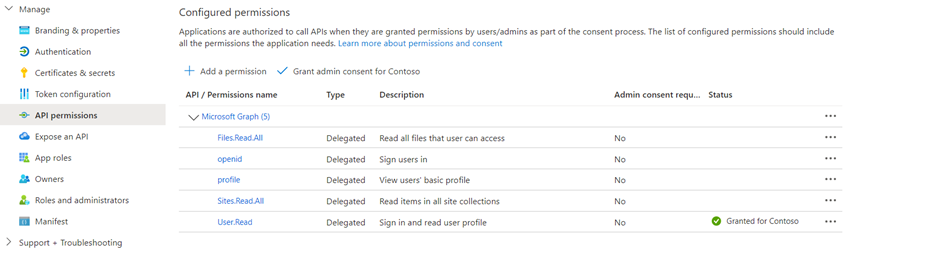
- The scopes should include profile openid and the following, depending on your use case:
- Sites.Read.All Files.Read.All for SharePoint
- ExternalItem.Read.All for Graph Connection
- https://[OrgURL]/user_impersonation for Prompt Nodes and Dataverse structured data
- For example, Dataverse Structure Data or Prompt Node should have the following scopes: profile, openid, Sites.Read.All ,Files.Read.All https://myorg123.com/user_impersonation
Now all the Setups are completed !!!
Test the Copilot:
- We can now start testing the Copilot.
- When you open the Copilot, it will straight away prompt to Login if the user is not authenticated.
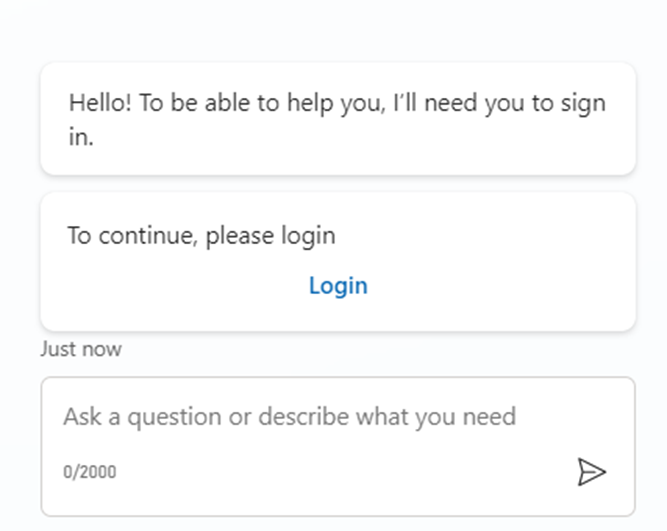
- Click on Login will open a new tab, that provides a validation code as shown below.
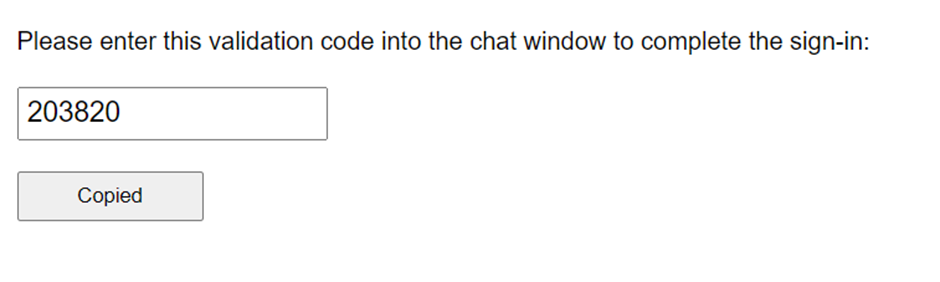
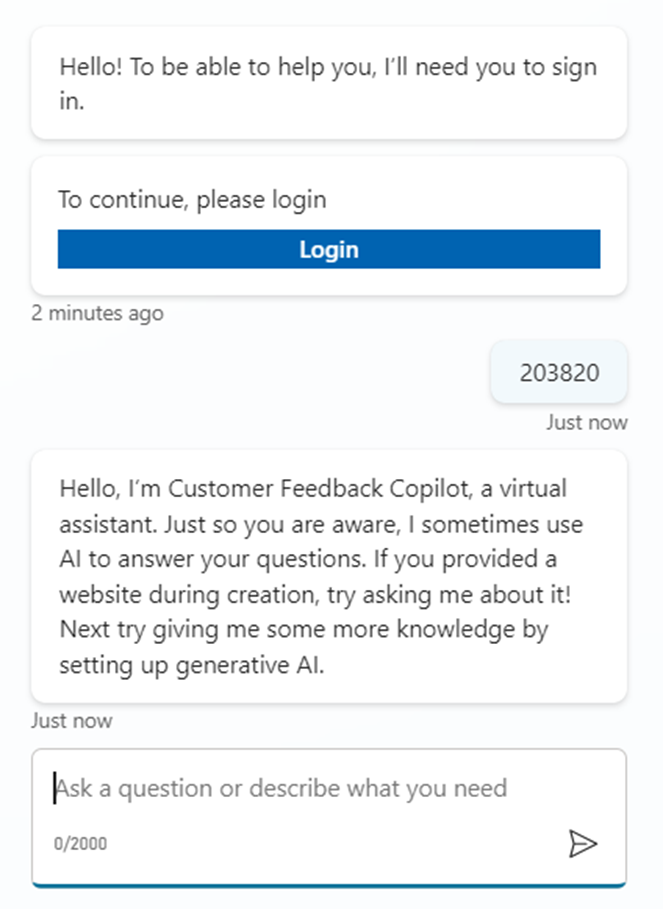
- User needs to Copy paste the code inside the Bot conversation to allow Bot to validate.
- Once the Copilot validates, then the Conversations will start as shown below.
- If the Validation code is not provided, user will not be able to go ahead with the conversation.
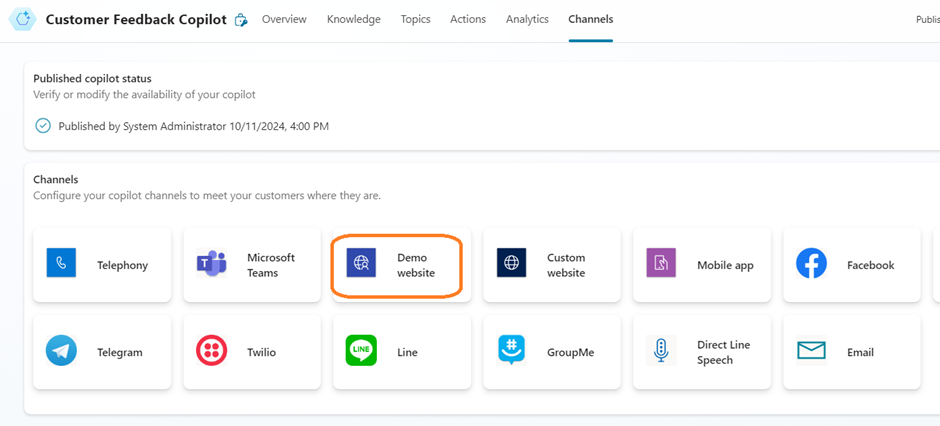
Setting up the Bot in Demo Website:
- Navigate to Channel tab.
- Click on Demo Website (in our test scenario).
- It opens a sidebar where we can specify some Welcome information if required.
- You can fill up the necessary details if required.
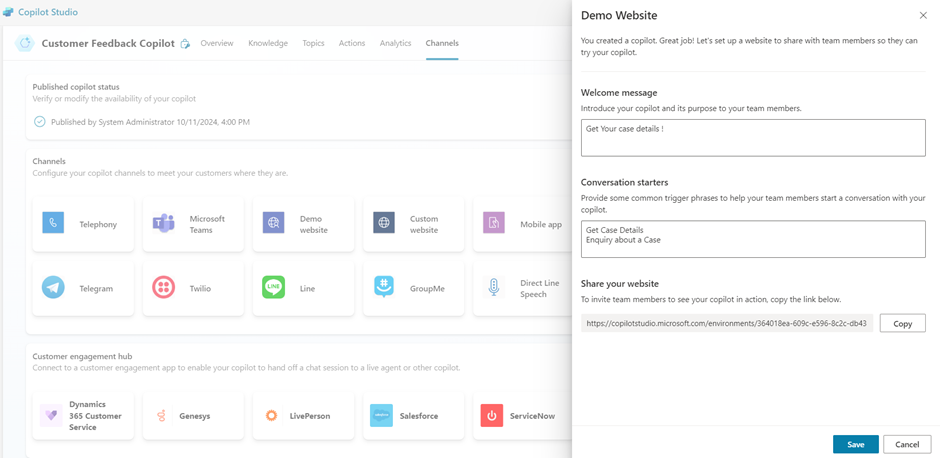
- Now you can copy the Link that is provided.
- This link will automatically open the demo website.

- Navigate to the link specified.
- Your demo website will open as shown below.
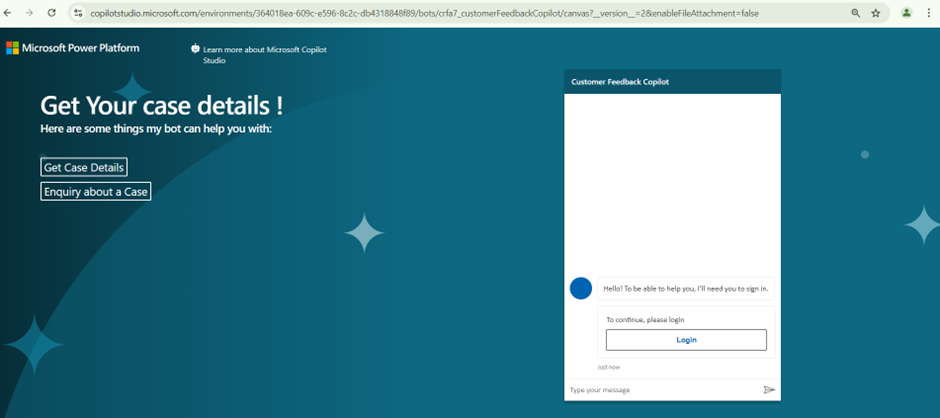
- As expected, it should Prompt for Login.
- The User needs to click on Login button. If the user tries to interact with copilot without login, the Copilot will still prompt the user to Login before continuing.
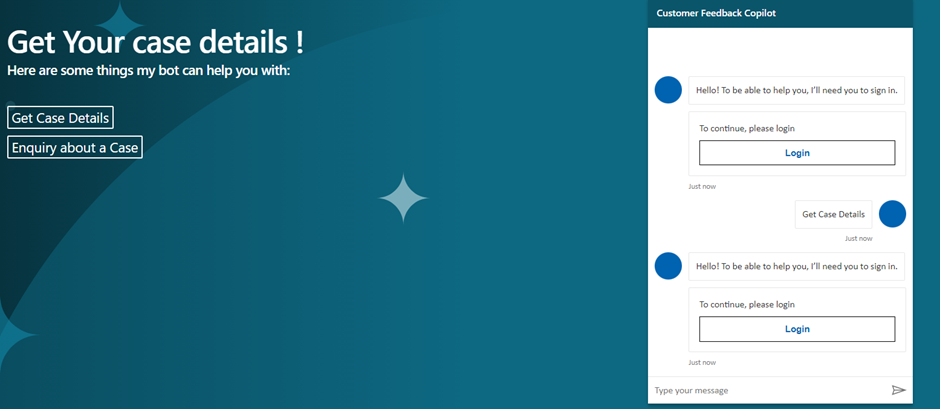
- As stated above, user will click on Login.
- A validation code will be generated.
- Paste the validation code into the Bot conversation.
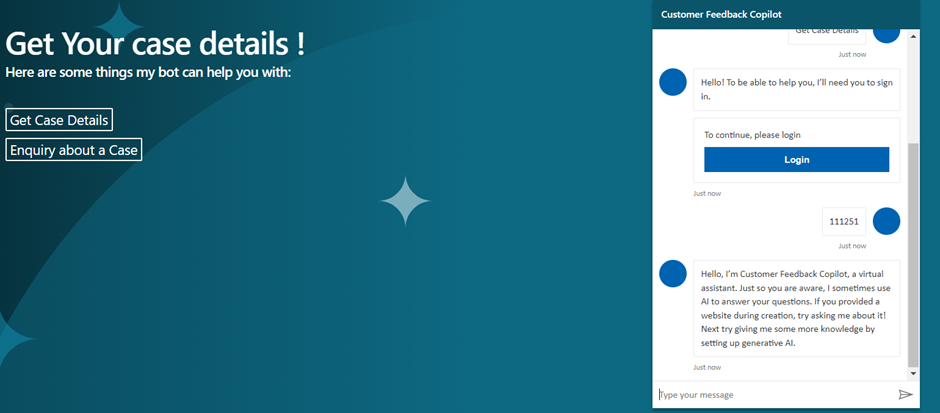
- Once the Copilot authentication is successful, it will automatically Start the conversation.
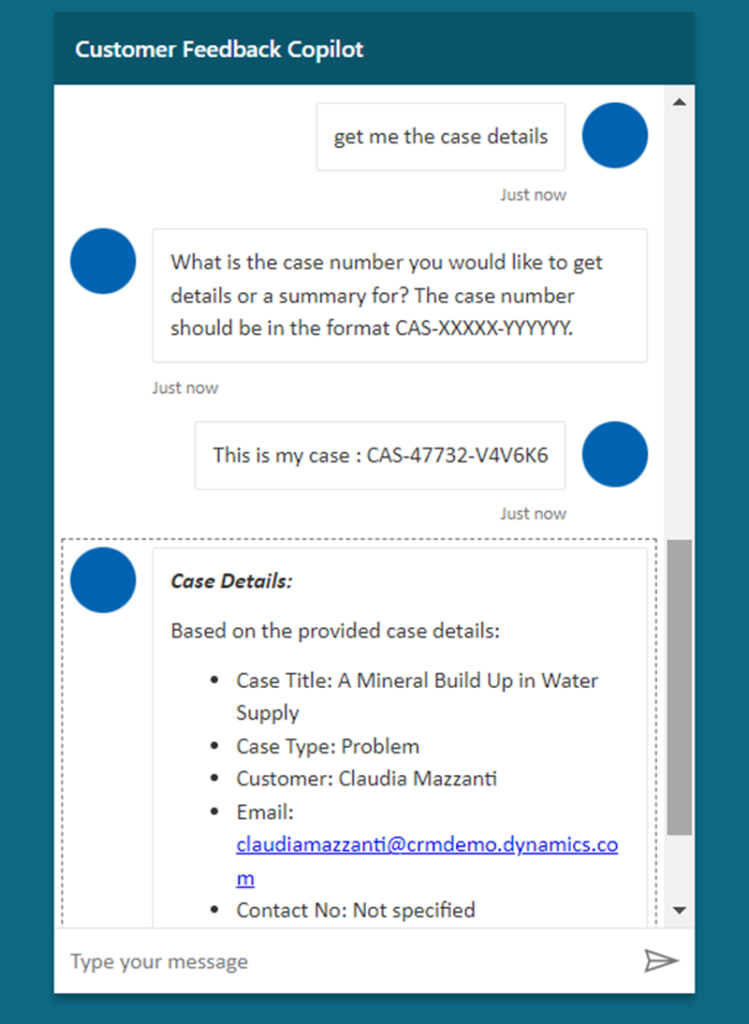
- Try asking copilot some sample questions. We can see the response being generated as expected.
What is Required user sign in?
- Require users to sign in determines whether a user needs to sign in before talking with the copilot. Recommendation is to turn on this setting for copilots that need to access sensitive or restricted information.
- If you turn off this option, your copilot doesn’t ask users to sign in until it encounters a topic that requires them to.
- When you turn on this option, it creates a system topic called Require users to sign in. This topic is only relevant for the Authenticate manually setting. Users are always authenticated on Teams.
- The Require users to sign in topic is automatically triggered for any user who talks to the copilot without being authenticated. If the user fails to sign in, the topic redirects to the Escalate system topic.
Reference Links Used:
https://msdcentral.site/copilot-studio-sample-use-case-copilot-in-custom-website-integrated-to-dataverse-and-ai-builder/
https://learn.microsoft.com/en-us/microsoft-copilot-studio/configuration-authentication-azure-ad
https://learn.microsoft.com/en-us/microsoft-copilot-studio/configuration-end-user-authentication#authenticate-manually
Happy Copiloting !!!


