You’re passionate about AI and eager to shake up your enterprise with it. Yes, Microsoft Copilot Studio is a brilliant choice for crafting your custom agents! But, let’s be honest: would you seriously build straight in Production? Didn’t think so! Like any smart developer, you want to start in Dev and follow that trusty Dev-QA-Prod journey.
Here’s the good news: Copilot Studio supports Application Lifecycle Management (ALM). You can neatly package all your agent bits inside a box called Solution, and then whisk it off to the next environment when you’re ready. Copilot Studio lives inside the Power Platform world, so it mostly sticks to the Power Platform ALM playbook. But, and it’s a big but, unlike Power Apps or Power Automate, not every single agent component magically gets added to the Solution when you create it.
Based on my own experience, here’s a dose of real-world advice to keep your Copilot Studio agents gliding smoothly from Dev to QA to Prod. Stick around for what to do, and what to absolutely avoid, so your ALM journey is as slick as your AI agent!
Create Your Agent ALM-Ready
Start in a Solution - Not on the Home Page
When you create an agent from the Copilot Studio home page, it lands in the Default Solution, which is the big pool of all Power Platform components, not the individual box inside which you want to keep you agent and it’s components.
Instead, follow this path:
Navigate to Solutions → Create a new solution → Choose a Publisher → Add New → Agent

 Creating the agent from within a solution ensures it's correctly scoped from the start, and all supported components will flow into the same solution container.
 Effectively Manage Copilot Studio Components Within a Solution
When you add an agent inside the solution, below components get automatically added to the solution when you add them to your agent -- Agent details (overview, instructions, settings)
- Topics with nodes
- Agent Entities
- Tools – Power Platform Connectors - connection references
- Tools – MCP - connection references
- Child Agents
- Cloud Flow used as trigger for Autonomous Agents
What does not get added automatically –- Knowledge Sources
- Copilot (Graph) Connectors
- Agent Flows
- Prompts
- Connected Agents
- Evaluation Test Sets
Important Step:To add all necessary agent components above to your solution and avoid issues in the target environment, go to the solution, right-click the agent → Advanced → Add Required Objects. Copilot Studio will inspect the agent and pull in all dependent components, including knowledge sources that aren't already in the solution. Please note : When a Dataverse table is added as a knowledge source, only the table schema is included in the solution; table data is not transported. This behavior is consistent with Dataverse and Power Platform ALM practices.
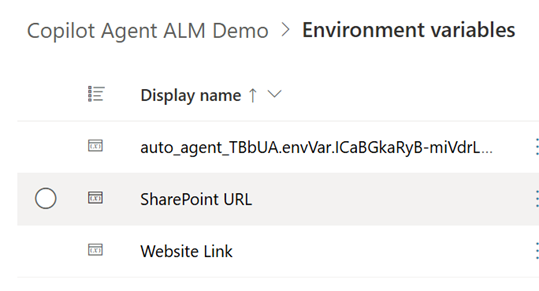
Configure Your SharePoint and Public Website Knowledge Sources Using Environment VariablesYou might have used different links for SharePoint and Public Website knowledge sources for testing purpose, and want to replace those with actual links in QA and Prod. Copilot Studio now supports Environment variables for website and SharePoint knowledge sources, so that you can put the links in environment variables and point to those in the knowledge source. While importing the solution to target environment, you can change the current value of environment variables or use the default value as fall back.
Pre-Export Checklist
When you create a solution in Dev, it’s unmanaged, that means all the components can be edited. If we want to move the agent within another Dev environment, we should export as unmanaged, but if we want to move to QA and Prod, we should move as managed so that the components can’t be changed.Checklist before exporting the solution –- Within Solution, publish all customization.
- Run Solution Checker
- If doing manual export, it will show you missing dependencies, add those to your solution
Please note that, the user who is importing the solution will be the owner of the solution, agent and all connections in the target environment.Source Control Integration for Copilot Studio Agents
- If all your Dev environments are managed environment, you can put your solution to Azure DevOps using Power Platform Native Source Control Integration . Click the Git-Connect icon as shown below from your Solution, click Connect and provide your Azure DevOps details.
This is how it looks like when you connect to Azure Dev Ops through Native Git Connect, you can see the Agent yaml, history of commit, compare with a previous version. Azure Dev-Ops specific features like branching, merging, Pull request is possible
- If your Development environment is unmanaged, Native Git Integration feature is not available. However, you can create Azure DevOps pipelines for exporting Power Platform solutions to Azure DevOps repository and deploy to other environments. I earlier wrote a blog on this - https://community.powerplatform.com/blogs/post/?postid=a882ba6c-af56-4540-8e0c-b37dec921f6d
Move unmanaged solution to another Development Environment
- Manual Export – Export the solution zip file and import it into the target environment. Update environment variables and connection references as needed, and select or create the appropriate connection.
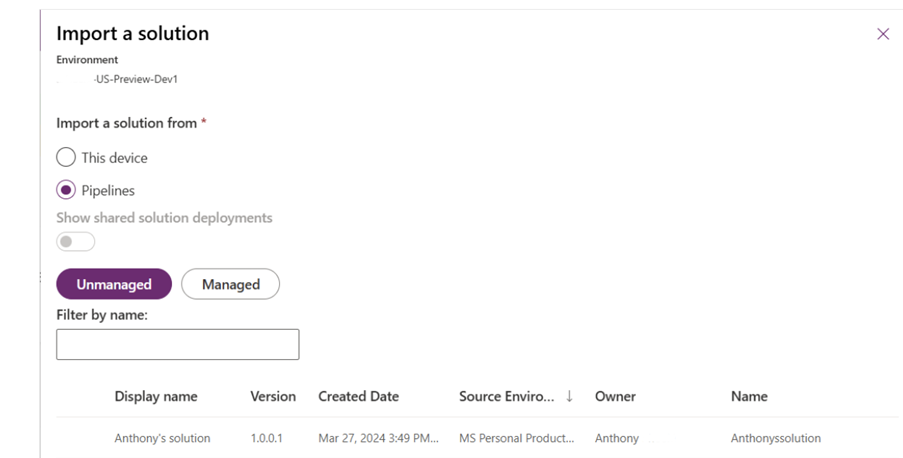
- Power Platform Pipelines – You can create Power Platform pipeline for deployment, and use the Import from Host feature to import unmanaged solution in your target environment - https://learn.microsoft.com/en-us/power-platform/alm/import-from-pipelines-host
- From Source Control
- For native power platform source control, create a solution with same name in target environment, bind to the same Git Connection, and pull the code from source control
- If you have pushed your code to source control using Azure DevOps pipelines, you can create release pipelines for deploying either unmanaged or managed solution into another environment,
Move Managed solution to QA or Prod
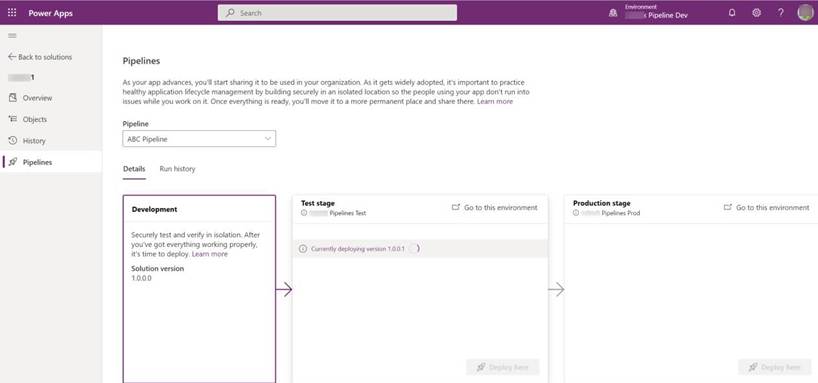
- If your development environment is managed, you can deploy with Power Platform Pipelines, more details here - https://learn.microsoft.com/en-us/power-platform/alm/pipelines
- For unmanaged environments, use Azure DevOps pipelines as mentioned above.
- Manually export managed solution and import to target environment.
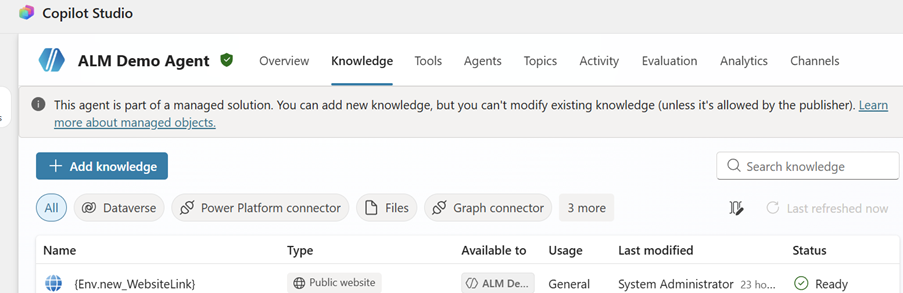
Managed Copilot Studio Agent's Behaviour in a Production Environment
Below is the editability option for each the agent component inside managed solution -| Item | Editability |
| Agent Name and Description | Can't be edited |
| Instructions | Can be edited |
| Knowledge |
Adding new allowed, editing existing not allowed (unless permitted by publisher). Learn more about managed objects.. |
| Tools |
| Connected and child agents |
| Topics |
| Publishing Channels | Can be edited |
| Evaluations | Can be edited |
| Environment Variables and Connection References | Can be selected during import, also can be edited later by selecting them from Default Solution in the Prod Environment
|
Release a newer version of Agent to Prod
Once you are ready with your changes in Development environment, you can move the solution to Prod using any of the methods above. If you are importing manually, you will get 3 options as below, choose which suits your needs
Don't forget to re-publish your agent after importing the new version.
References


